Install and Configure SyncEzy Integration Platform for Autodesk Account
Install and Configure SyncEzy Integration Platform for Autodesk Account
1. Navigate to https://acc.autodesk.com/projects and login to your Autodesk account
2. Click "Account Admin"

3. Click "Apps"

4. Search for the app Two Way Sync for Autodesk Build® and SharePoint and click on it

5. Click "Install"

6. Click "Authorise and Install"

7. Once done please login to your SyncEzy portal at https://integrations.syncezy.com/
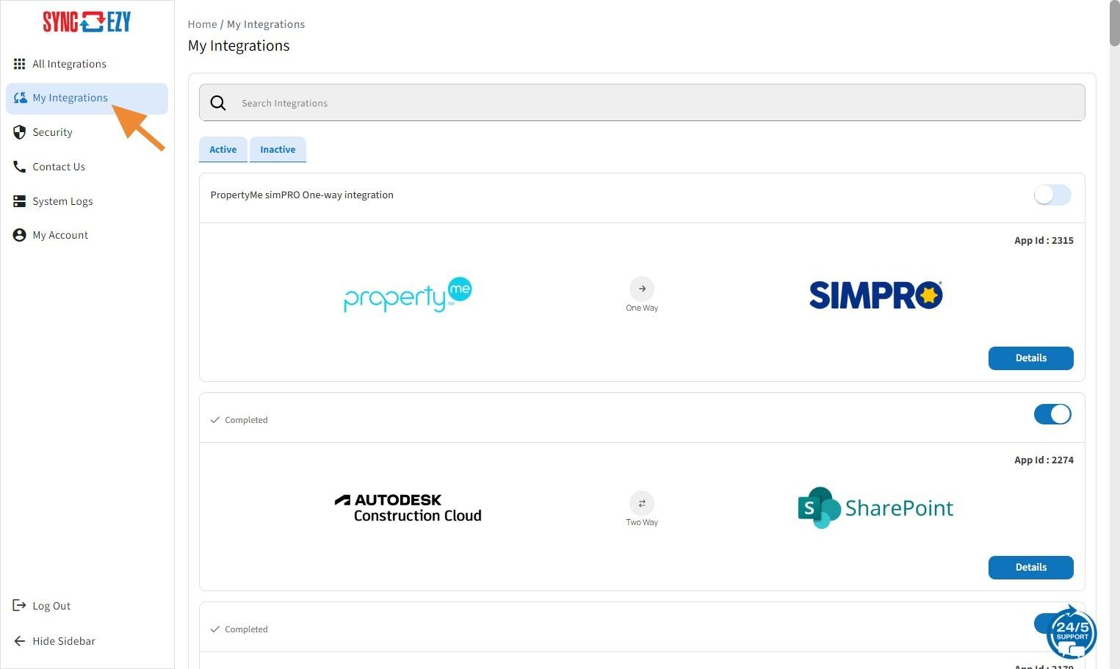
8. Click on My Integrations

9. Click on Details button to open the integration

10. Click "Connect" to connect your Autodesk account

11. Enter the credentials to authorize your Autodesk account.

12. Click "Allow"

13. Once Autodesk account is connected, please click on Connect button to authorize SharePoint account.

14. Click this button.

15. To sync your projects click on "Configuration"
16. Click "Add Project to Sync"
17. Select Autodesk company

18. Click the "Autodesk Project" field to select the project

19. Select the tools that you would like to sync with our integration.

20. Click the "SharePoint Site" field and select the site where you would like to sync the files

21. Click "Verify this Location" after selecting the path location.
22. Click "Add Project"
23. The project is now added

24. Click "File Manager" to view the syncing files

25. Select the project for which you want to view the files

26. Click "Search"

27. You will see the status of the files. The "File Manager" tab offers a comprehensive view of files in both Autodesk and SharePoint, allowing easy navigation and management.
Related Articles
Autodesk to SharePoint 2-way Integration FAQs
Setting Up Your SyncEzy Integration Between Autodesk and SharePoint Before you attempt to connect your company's Autodesk and SharePoint in your SyncEzy integration portal, please review the following article below and follow the instruction in order ...Procore to Dropbox 2-way integration FAQs
This document addresses the variety of questions we encounter while helping clients. If you have a question that’s not addressed her please write to us at support@syncezy.com About the Procore to Dropbox integration Please also visit our Integration ...Benefits & Steps to Create Service User Credentials for your SyncEzy Integration between Autodesk Construction Cloud and SharePoint
See our articles linked for step-by-step instructions on how to set up a service user credential with the right permissions in Autodesk Constrcution Cloud and SharePoint respectively to quickly get this step done and syncing! Please do not hesitate ...Procore to SharePoint 2-way integration feature updates 2023
Procore to SharePoint Integration Feature Updates Greetings from SyncEzy, We are excited to share with you an overview of feature updates for your Procore to SharePoint 2-way integration. These integration feature updates are designed to ensure you ...Overview of Autodesk-SharePoint Integration
Summary This guide provides a comprehensive overview of the Autodesk Construction - SharePoint integration dashboard and reporting tools available. Dashboard The Dashboard tab offers detailed information on your added projects, including project ...