Integration Portal Integration Overview
Summary
This document is an overview of the main page on SyncEzy's integration portal, integrations.syncezy.com. If you have any queries, please write to support@syncezy.com
All Integrations
In the All Integrations page, you can view all of our integrations, their pricing and select the integration you need. It is essentially a catalog for you to choose from. Click on Subscribe when you choose the integration. You can also use the search bar to look for the integration you want. Clicking on the blue question mark will give you a guided tour of the page.
My Integrations
In the My Integrations page, you can view the integrations you have subscribed to.
In the Active tab, the apps that are toggled on and have both accounts connected will be displayed.
In the Inactive tab, the apps that you have subscribed to but not connected your accounts will be displayed.
Click on the Details tab of the integration you are subscribed to to view more details.
If the Active tab is empty, you will see a button to subscribe and that will take you to the All Integrations page.
Security
The Security tab will allow to edit many details related to your account and to toggle security related settings on your account.
Enable 2FA
Toggling this option will enable Two Factor Authentication when logging into your account
Once you enable it, you will be prompted if you want to enable MFA. Click Yes if you wish to proceed.
Once you click yes, you will be directed to the Authentication screen. Click on "Authenticator App" to proceed with the linking to your chosen Authenticator app.
You will then be redirected to a screen with a QR code and asking you for a one-time password. Scan the QR code or enter the key in your preferred authenticator app and enter the one time password. Click Authenticate and your Two Factor Authentication should now be live in your account.
Timezone
You can choose your preferred timezone from this dropdown.
Change Password/Confirm Password
These textboxes are to change your login password to the portal.
Display Name
Change your preferred display name here.
First Name and Last Name
Change your First Name and Last Name associated with your integration here.
Email
This field is not editable. It displays the email you used to sign up to the integration portal.
Phone Number
Change the Phone Number associated with your integration here.
Currency Code
This field is not editable. It displays the currency with which the integrations will be listed in. Contact SyncEzy support if you need this changed.
Contact Us
SyncEzy has four phone numbers you can dial.
AUS: +61 2 9136 9448
NZ: +64 9 303 2999
UK: +44 203 670 1109
US: +1 720 500 9302
Email Us
You can choose to email Sales, Support or Billing for any queries you might have.
Book a meeting
You can book a meeting with our Support team or Sales team on the right hand pane.
My Account
This section includes details about your user profile, billing details and adding team members.
My Profile
These fields are non-editable. You can find the Name, Email, Country, Phone Number and User Type associated with your account.
Billing
Please note only the Owner and the user with "Account" access can access the billing tab. You can find all of your invoices billed to SyncEzy on this page. The table shows the status, amount, invoice number. You can also download the invoice or email it to the email address associated to the SyncEzy account.
Please note : If you need to change billing details please contact us through one of the support channel mentioned at the end of this page.
Please note : If you need to change billing details please contact us through one of the support channel mentioned at the end of this page.
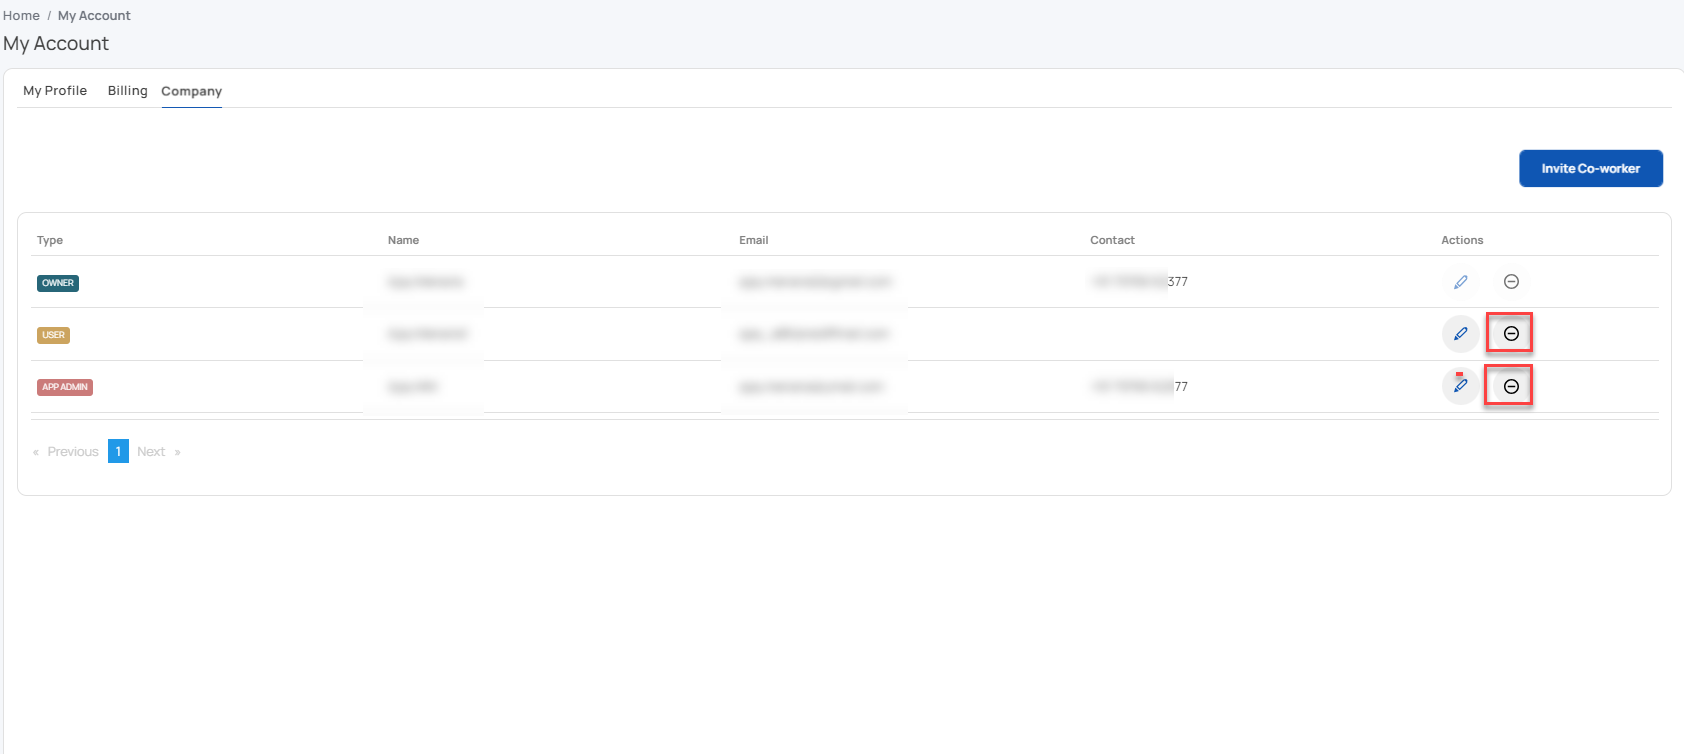
Company
To invite a co-worker to manage/view the integration or billing, follow the instructions given below.
Please note: All existing account owners who already have users added to their account will also be required to create a company (if not already created) in order to make any changes or add/remove co-workers.
Please note: All existing account owners who already have users added to their account will also be required to create a company (if not already created) in order to make any changes or add/remove co-workers.
Creating a Company (For First-Time only, if the company has already been created then please jump to 6th step )
- If you're adding a co-worker for the first time, you need to create a company first.
- Follow the instructions provided in the guided screenshot to create your company
- Click on "Create Company."
- Enter the your company name.
- Click on the "Save" button to create the company.
- Once the company is created, a new Company tab will appear in the "My Account" section.
- Navigate to the company tab.
- Look for the option to invite co-workers to join your company account.
Please note that only the Owner of the account can add a co-worker and make the changes under the "Company" tab.
An Owner of the account can add multiple team members to integrations with different permissions. The list of users who have been invited and accepted will show up here.
An Owner of the account can add multiple team members to integrations with different permissions. The list of users who have been invited and accepted will show up here.
Click on Invite Co-worker to add a team member.
There are four types of users you can add. Permissions can be found in the table below.
Invite additional users to your integration account by filling in the Name, Email and User Type fields prompted.
Please note that once an invite is sent, invitees will be required to accept the invite and setup their account. For security reasons, the invite will expire after seven days.
Change access of an existing user
An Owner of the account can change the access of an existing user by clicking on the "Pencil Icon" button.


Transfer of Ownership of Company
If you wish to transfer ownership of your company to an existing user, simply follow the process outlined in the above section. Changing the role of the designated user to "Owner" will designate them as the new owner, while automatically transitioning you to an APP Admin role. Subsequently, the new Owner can log in with their credentials and, if necessary, remove you from the account in the event of your departure from the company.
Alternatively, if you prefer to transfer ownership to a new user, initiate the process by inviting them as an APP Admin (refer to step 8 above). Once the invitation is accepted and the user is added, modify their role to "Owner." This action will automatically transition your role to APP Admin, and the newly appointed Owner can log in with their credentials. In the event of your departure from the company, they can then remove you from the account.
Deactivate an existing user
An Owner of the account can remove an existing user by clicking on the "Delete" button.
Have a support question?
We offer three support channels:
Chat - Live Chat (24x5 support) from within your integration portal.
Phone - # 1 for Support
AUS: +61 2 9136 9448
NZ: +64 9 303 2999
UK: +44 203 670 1109
US: +1 720 500 9302
Email - support@syncezy.com
Related Articles
Procore to Dropbox 2-way integration FAQs
This document addresses the variety of questions we encounter while helping clients. If you have a question that’s not addressed her please write to us at support@syncezy.com About the Procore to Dropbox integration Please also visit our Integration ...Procore to SharePoint 2-way integration feature updates 2023
Procore to SharePoint Integration Feature Updates Greetings from SyncEzy, We are excited to share with you an overview of feature updates for your Procore to SharePoint 2-way integration. These integration feature updates are designed to ensure you ...simPRO - QuickBooks Workforce Integration - SyncEzy Portal User Guide - Import New Jobs
Integration Portal User Guide simPRO - QuickBooks Workforce Integration - Import New Jobs When you log in, you will see that there are various manual “push” functions. The first of these is Import New Jobs. This function imports any new jobs created ...simPRO - Salesforce Integration - SyncEzy Portal User Guide - Overview
IntegrationPortal User Guide simPRO - Salesforce Integration - Overview A typical workflow for your team might be as follows: Nurture leads and track opportunities in Salesforce Send contact and company from Salesforce to simPRO when ready to create ...SimPRO - Zoho CRM Integration Overview and SyncEzy Portal User Guide
Integration Portal User Guide simPRO - Zoho CRM Integration - Overview Summary In summary, the integration offered by SyncEzy between simPRO and Zoho can achieve the following: 1. Sync Accounts, Contacts, Sites, Quotes, and Jobs automatically from ...