Project Sync: Essential Project Permissions in Procore to Get Started
Project Sync: Essential Project Permissions Required in Procore to Set-up your SyncEzy Account & Integrations
So for all the projects that you will configure, the authenticated user needs to have Admin access to those projects in Procore. Your Admin access on those projects will ensure smooth syncing of files and folders between Procore to SharePoint and vice versa.
Step-by-step Guide: Creating a Service Account And Selecting the right permissions in Procore.
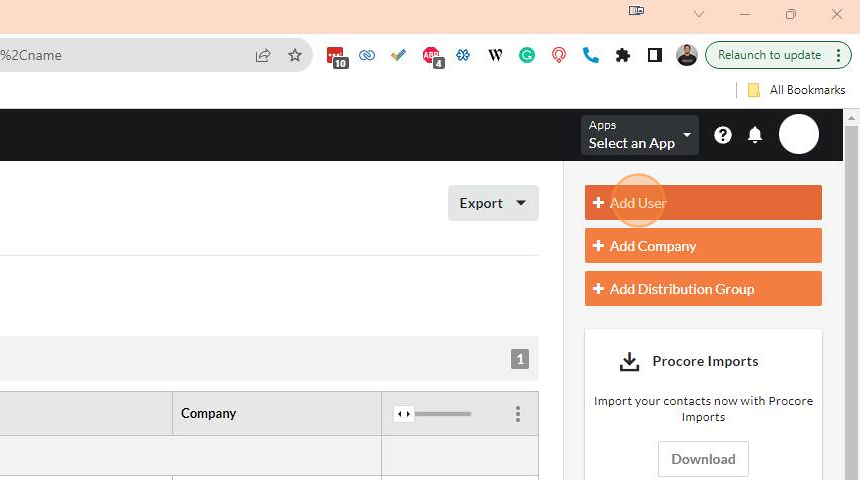
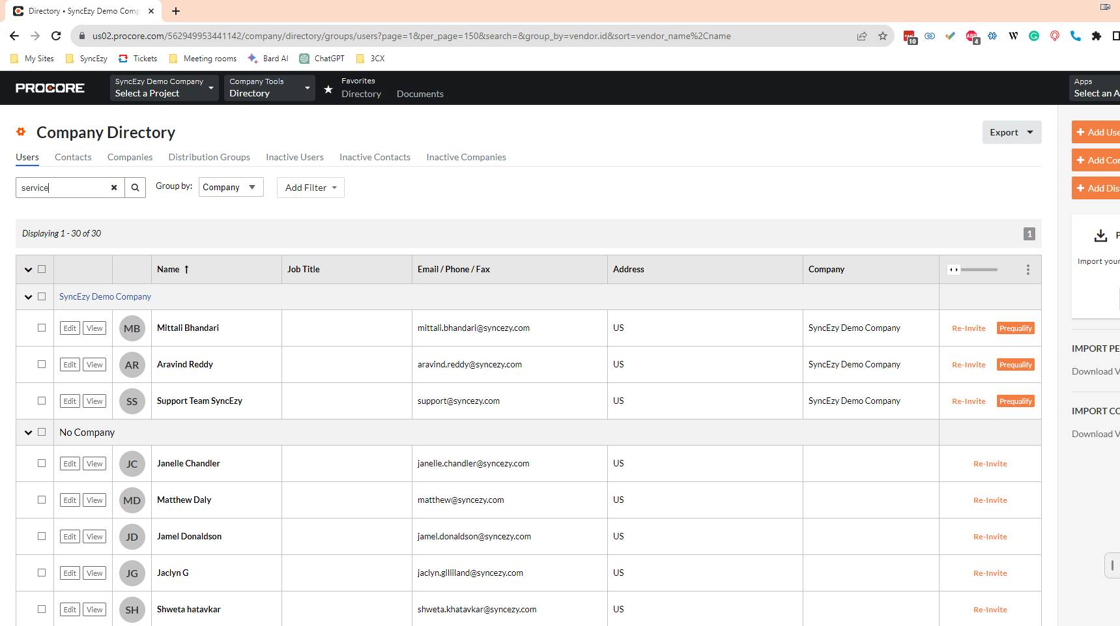
1. Go to Procore and add a new users.
2. Enter the relevant details here, use SyncEzy in the name so it will make it obvious to the users when they see the name in the meta data of the files.
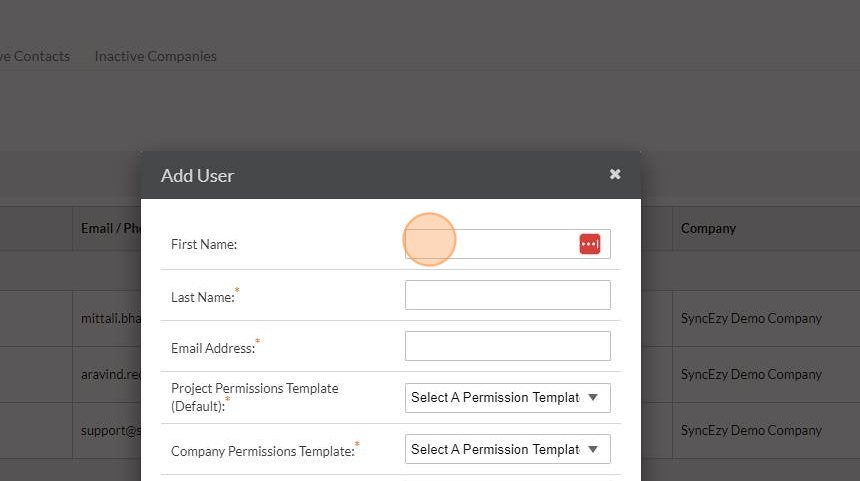
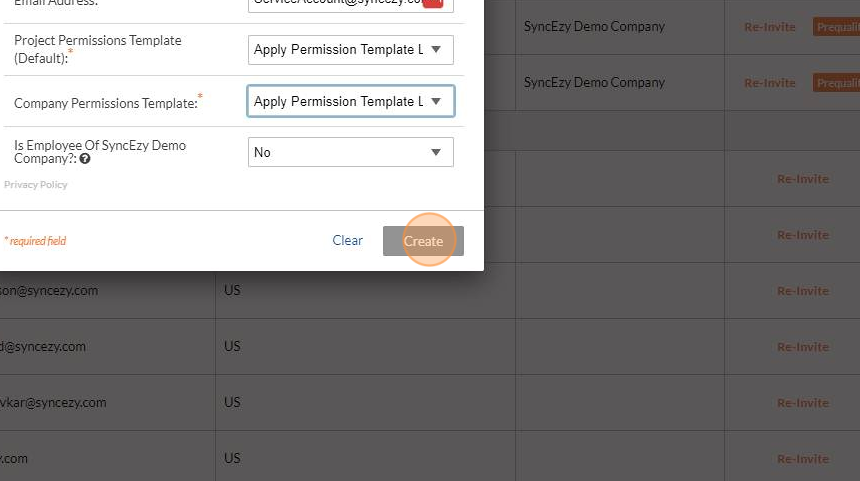
3. Choose apply permissions template later.
Create the User and set permissions on the next screen.
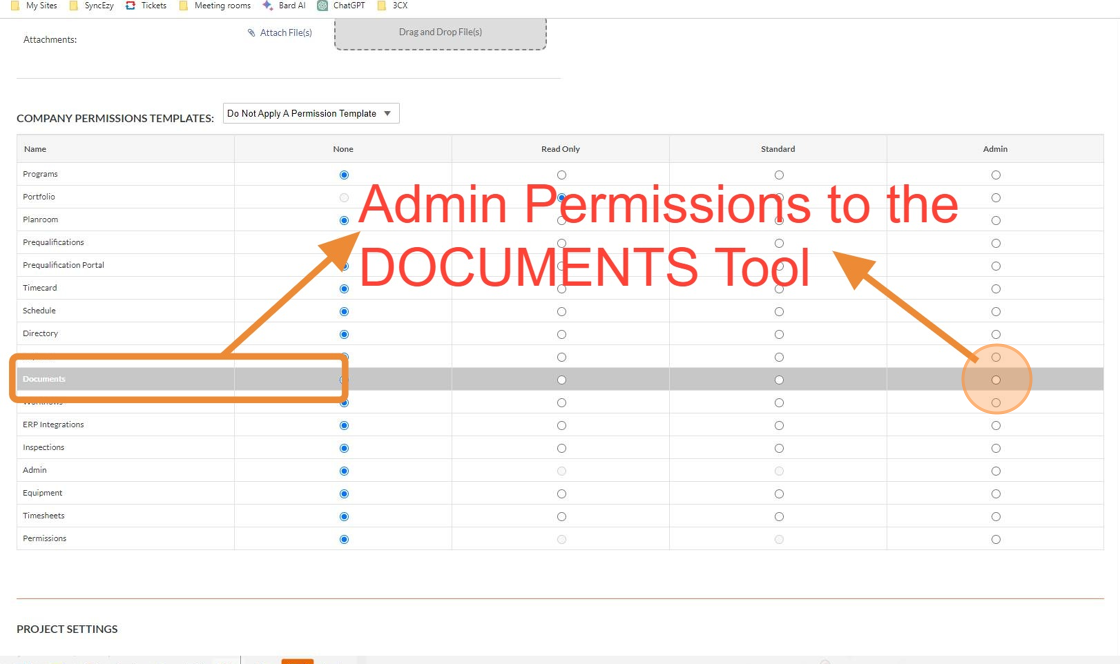
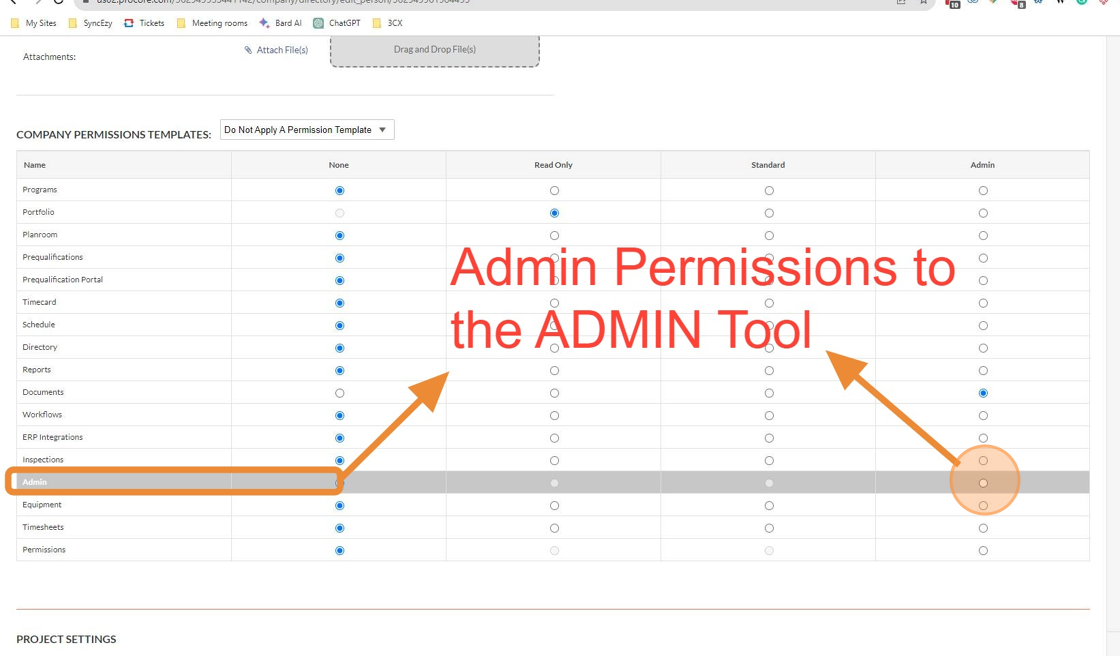
4. Provide Admin Permissions to the Documents Tool
5. Provide Admin Permissions to the Admin Tool
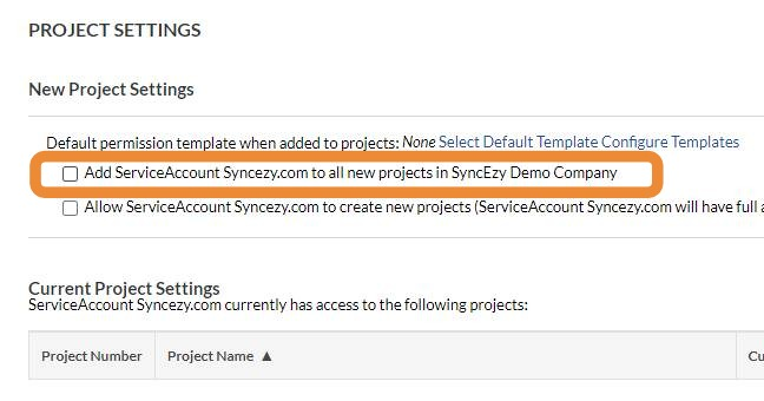
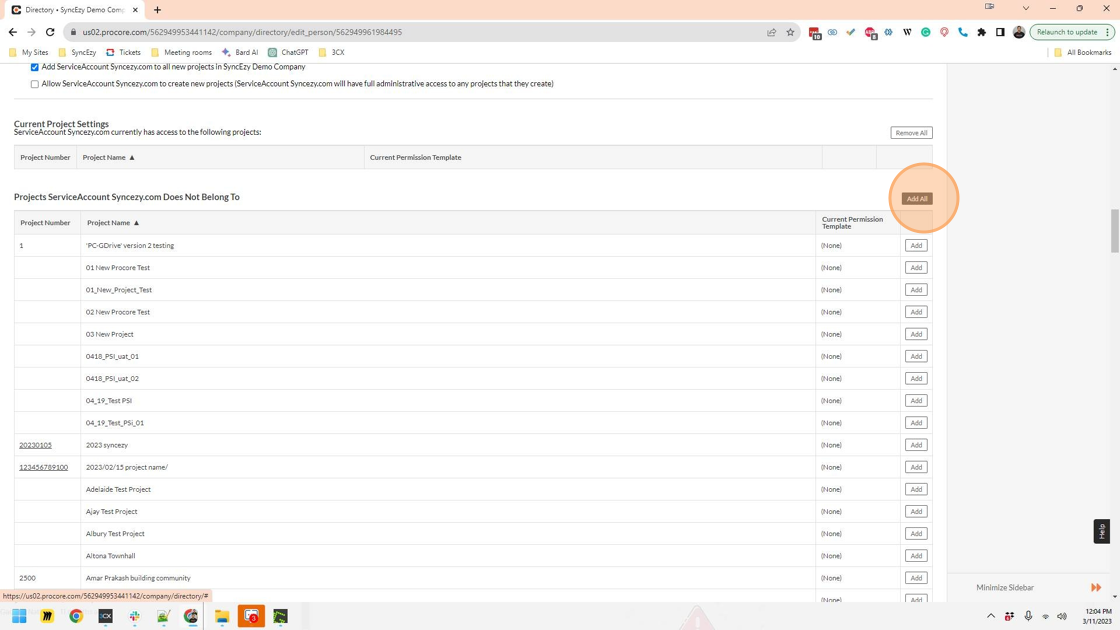
6. Auto Add the Service Account to all New Projects in the Company.
This will ensure that all future projects will be available in the SyncEzy integration.
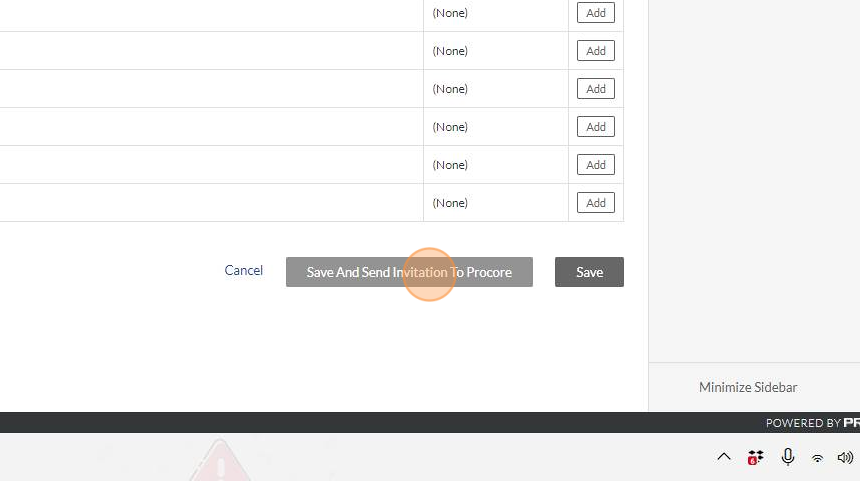
7. Save and Send invitation to Procore
Then setup a password for this new user from the email invite. We will use these login details to Authenticate the integration.
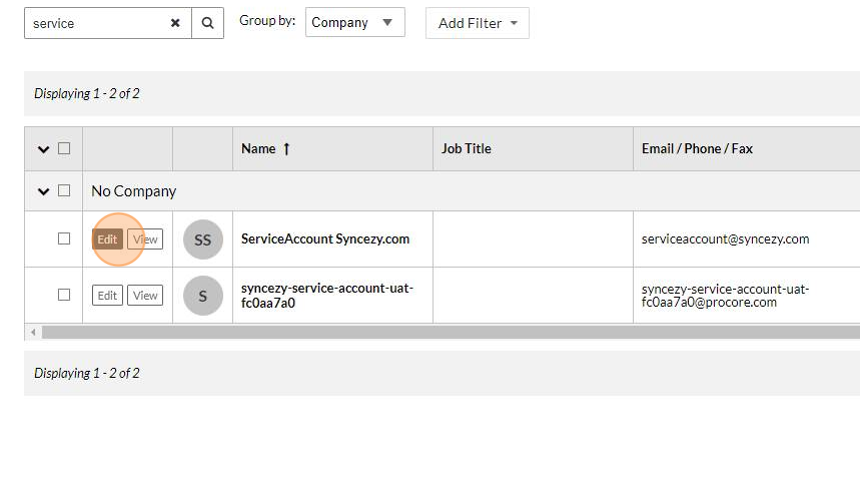
8. Search for the same service user again. Edit the User.
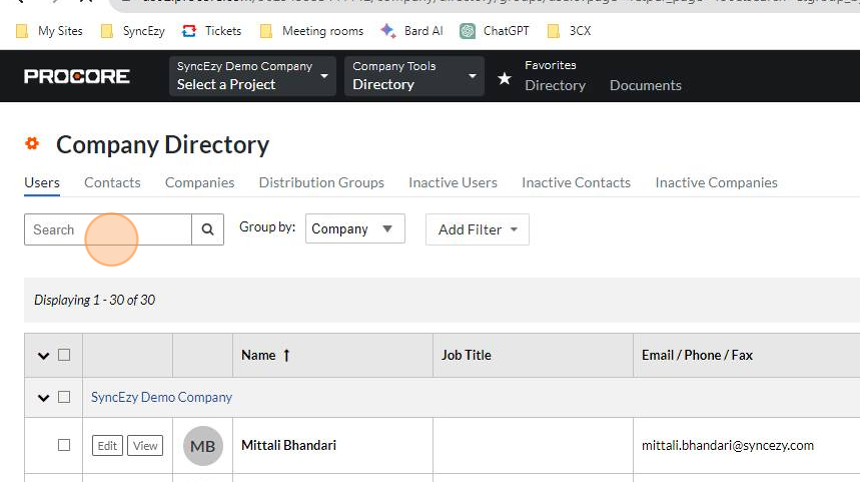
9. Find and edit the user, to add them to the existing projects.
10. Edit User
11. Add ALL so that the user has access to all the current projects in Procore.
Other Questions
View Frequently Asked Questions
Have a support question?
Related Articles
Project Sync: Essential Project Permissions in Procore to Get Started
Project Sync: Essential Project Permissions Required in Procore to Set-up your SyncEzy Account & Integrations To sync projects, the user credentials used to connect your Procore account in your SyncEzy integration need to have access to all the tools ...Project Sync: Essential Project Permissions in Procore to Get Started
Project Sync: Essential Project Permissions Required in Procore to Set-up your SyncEzy Account & Integrations To sync projects, the user credentials used to connect your Procore account in your SyncEzy integration need to have access to all the tools ...Project Sync: Essential Permissions in SharePoint to Get Started
Essential SharePoint site permissions for syncing In SharePoint, permissions are crucial and have been consistent across various site types, including Office 365 Group Sites and Communication Sites. The concept is straightforward, with each site ...Project Sync: Essential Permissions in SharePoint to Get Started
Essential SharePoint site permissions for syncing In SharePoint, permissions are crucial and have been consistent across various site types, including Office 365 Group Sites and Communication Sites. The concept is straightforward, with each site ...Essential Project Permissions in Autodesk Forma (formerly Autodesk Construction Cloud) to Get Started
Project Sync: Essential Project Permissions Required in Autodesk Forma (formerly Autodesk Construction Cloud) to Set-up your SyncEzy Account & Integrations For Project Sync: To sync projects, the user credentials used to connect your Autodesk Forma ...