PropertyMe-Power BI setup documentation
Recommended Drivers
You will need the latest MySQL Connector/NET driver in order to connect your QuickBooks Time data to PowerBI. The links can be found below. Download the driver based on whether your system is a 32-bit or 64-bit system.
Setup Instructions
1.Login or register with your company email address at https://integrations.syncezy.com
2. In the All Integrations, find the PropertyMe Power BI integration and click “Sign Up”. If you already purchased the integration, navigate to My Integrations
3. Once you go into My Integrations and app Details, you will have to connect your PropertyMe Account. Click on Connect and you will be redirected to the PropertyMe login page. Select the Portfolio you want to sync and press “Yes, Allow”. Your account should now be connected. Please click here to view the tutorial on how you can connect PropertyMe account in your integration portal.
4. Once authenticated and connected, Click on Sync Now button under Sync Now tab to start the sync . Check the Sync status tab for sync complete status.
5. Once Sync is completed, Navigate to Connection Details under Details Tab
6. Open PowerBI Desktop and select “Get Data”.
6. Search for MySQL database in the options that pop up. If you cannot see this option you will need to install MySQL-connector-net for Power BI.
7. In Server, copy the “Database Host Name” from the SyncEzy portal. In Database, copy the “Database Name” from the portal. Press ok.
8. In the next screen, go to the “Database” section and enter the Database Username and Database password given on the SyncEzy portal.
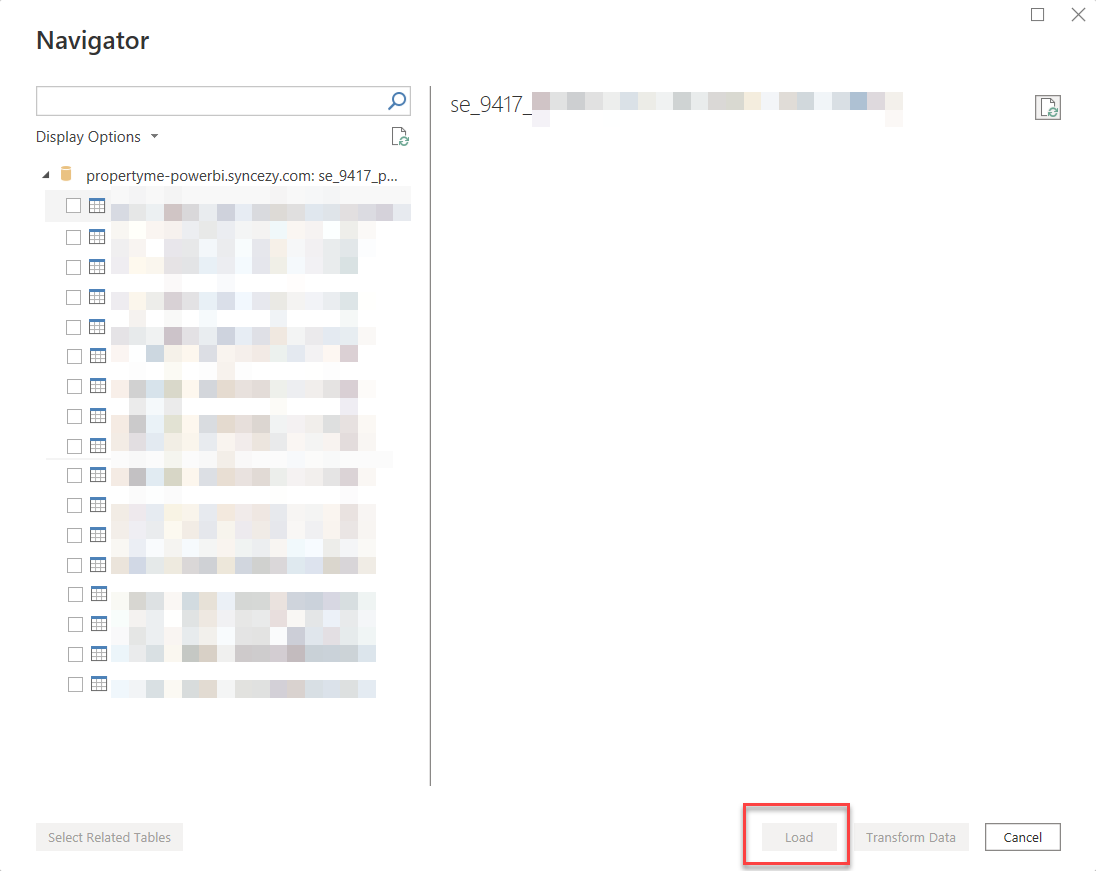
9. You will now get a list of tables. Select the tables you want and select “Load”. This will load the database table to your PowerBI project.
Use PowerBI Gateway - Automate your data refresh
PowerBI does not automatically refresh data, neither on the desktop app nor the web browser. PowerBI Gateway can help you achieve this. Below are the steps to install gateway and to automate your data refresh.
- Publish your PowerBI report and go to app.powerbi.com
- Go to Data Hub and click the "..." on the report you published. Click Settings.
- Expand the Gateway Connection section right above Data Source Credentials.
- Install the gateway software by clicking on the green Install Now button and let it run on your PC. It will be called On-premises data gateway (personal mode) or On-premises data gateway (standard mode)
- Once you install this, refresh the page where you tried to enter the data source credentials. You will see an entry under Gateway Connection and under status, it should show "Running on <your PC name>".
- Now go to Data Source Credentials and click "Edit credentials".
- Enter your Database username and password from your SyncEzy Portal.
- It should now load successfully and your automated schedules will start running.
NOTE: PowerBI Gateway requires your system to be on. If your system is off, the gateway will stop running till you go to this section and start it again. The best way to handle this problem is to use a virtual machine that is always on.
Support Questions
View Frequently Asked Questions
You can view our QuickBooks Time to PowerBI related FAQs from here.
Contact Us
We offer three support channels:
Chat - Live Chat (24x5 support) from within your integration portal.
Phone - #1 for Support
AUS: +61 2 9136 9448
NZ: +64 9 303 2999
UK: +44 203 670 1109
US: +1 720 500 9302
Email - support@syncezy.com