Zendesk to SimPRO Installation and Overview Guide
Summary
This is a user guide to walk you through some of the basic functionalities of the SimPRO by SyncEzy extension for Zendesk. The functionality of the app, the configuration details, settings and support information is listed below.
Functions
Create a New QUOTE or a New JOB or Convert a QUOTE to a JOB in simPRO.
Link ticket to an existing JOB or QUOTE in simPRO. The ticket URL and Zendesk ticket ID will be in the Activity Timeline of the Quote/Job.
Transfer ticket information to the Quote/Job such as the description, ticket ID and automatically lookup the Customer and Site in simPRO.
Creates new customers if not found in simPRO using the email address from the Zendesk ticket. A Default Site is assigned if no Sites are found against the customer.
simPRO Multicompany support. Choose the company from the dropdown list to send a Quote/Job to that company in simPRO.
How to Install
Go to your admin page in the Zendesk account (url-prefix.zendesk.com/admin/home)
Click on Apps and Integration in the side bar
In the top right corner, click on Marketplace
In the “Filter apps” textbox on the left, search for “SimPRO by SyncEzy”.
Select the app once you find it. Once you’re in the page, click on Install.
The app should now be installed in your account. Go back to the location mentioned in step 1 and 2 and you should now see the app under “Currently Installed”.
You can also go to the Zendesk marketplace link directly: https://www.zendesk.com/marketplace/apps/support/848031/simpro-by-syncezy/
Configuration Details
Title
This will be populated automatically. The Title should be SimPRO Integration by SyncEzy.
Admin Email
Enter the email address of the administrator user. Alternatively, you can also enter the email of anyone in your organization. This will help us to communicate with you.
Default Site ID
Here you need to set the Default Site ID to create a Quote or a Job. A Site and a Customer are mandatory fields for creating a Quote or Job. In the event the Customer does not have a Site, the Default Site configured will be linked to the Quote/Job instead.
You will need to create a default site in simPRO, retrieve the Site ID and then add the ID in this field. You can also choose another Site if you wish, simply add that Site’s ID in this field.
Note: In the event you have a Multi-company setup, you will need to enter multiple site IDs separated by a comma. For example, in Company A the default site ID is 1234 and in Company B the default site ID is 9876. So the value here will be 1234,9876.
SimPRO Domain Prefix
This is used to connect your Zendesk account with your simPRO build URL.
For example, www.syncezy.simprosuite.com. In this example, we choose “syncezy” as the value to enter.
Multi Company
This field is used to enable Multi Company syncing. Only “Yes” or “No” are acceptable values. Type Yes if you want to configure simPRO Multi Company, Type No if you don’t or if you have a single company.
SimPRO Companies
If you don’t have a multi-company setup, enter 0 - company name here (eg. 0 - SyncEzy). If you wish to link only one company, you will need to enter the company ID - company name (eg. 4 - SyncEzy).
If you have a multi-company setup in simPRO, enter in this format: company ID - company name (eg. 6 - SyncEzy). For more companies, add the same with a comma separator (eg. 6 - SyncEzy, 7 - Zoho,..., etc).
simPRO Company IDs can be found by going to simPRO > Setup > Company
Note: Avoid using commas and dashes in the company name as these are specifically used as delimiters.
SimPRO API Key
To generate the SimPRO API key, go to Setup > API > Applications > Create Application. The values will be as follows:
Company: <Your Company Name>
Name: SimPRO Integration by SyncEzy
Redirect URI: /oauth2/accessCode (leave it as it is)
Email Address: <Your Email>
Description: SimPRO Integration by SyncEzy API Key
Notes: <blank>
Authentication Method: API Key
Click Create. You will see an “Access Token” at the bottom of your created key. This value should be copied and pasted into the SimPRO API Key section of this configuration.

Default Customer Type [Companies/Individuals]
In this option, you have to set the value as Companies or Individuals. This defines the customer type to be created from the extension, Company Customer or Individual Customer.
Default Project Type [Service/Project]
In this option, you have to set the value as Service or Project. This defines the Quote/Job type to be created from the extension, a Service Quote/Job or Project Quote/Job.
Create Customer in SimPRO if Email not found
When you disable this checkbox, the extension will link the default customer ID from the below setting if the customer's email is not found in Customers/Contacts. If this checkbox is enabled, the extension will create a new Customer for you depending on your Default Customer Type setting with some basic details such as Name and Email.
Default Customer ID
Add a default Customer ID as a fallback if the "Create Customer in SimPRO if Email not found" option is unticked. This will link this customer as a default if the Customer/Contact email is not found in SimPRO.
For Multi-company configurations, enter the default customer IDs of each linked company separated by a comma. Example, Company ID 1 has a default customer ID 1234 and Company ID 2 has a default customer ID 4567. Enter 1234,4567 as the value in this box if you entered 1 - Company Name, 2 - Company Name in the SimPRO Companies setting.
Description
The description field can be left as is. This field is used to prepopulate information on how to enter your configuration, a simplified version of this guide.
Enable Role Restrictions
If you want to restrict the users who see this application, tick the “Enable Role Restrictions” checkbox and choose the roles you want to restrict.
Note: This will have to be given to the “Admin” role at a minimum.

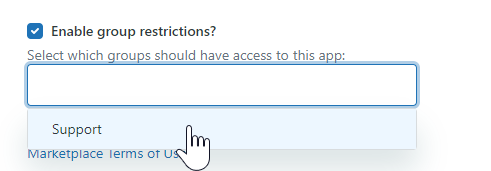
Enable Group Restrictions
This option is used if you want to select the user groups that should have access to this app.
Handy Tips
The extension will give you an error if something is wrongly entered in the configuration.
In case of any changes in the configuration, press Ctrl + Shift + R (Windows) or Command + Shift + R (Mac).
Have a support question?
Related Articles
Simpro to Google Drive (Two-way) Integration: A Comprehensive Guide
In today’s fast-paced construction and service industry, seamless collaboration and efficient document management are critical. The Simpro to Google Drive integration bridges the gap between these two powerful platforms, allowing your team to work ...Zoho Desk to Simpro (CRM Integration Users) Overview and Setup Guide
Introduction The Zoho Desk to Simpro integration allows you to send your tickets from Zoho Desk to a Quote or a Job in Simpro. The integration uses the email to search for a Customer or Contact and also allows you to choose a Site that is linked to ...simPRO - Salesforce Integration - SyncEzy Portal User Guide - Overview
IntegrationPortal User Guide simPRO - Salesforce Integration - Overview A typical workflow for your team might be as follows: Nurture leads and track opportunities in Salesforce Send contact and company from Salesforce to simPRO when ready to create ...SimPRO - Zoho CRM Integration Overview and SyncEzy Portal User Guide
Integration Portal User Guide simPRO - Zoho CRM Integration - Overview Summary In summary, the integration offered by SyncEzy between simPRO and Zoho can achieve the following: 1. Sync Accounts, Contacts, Sites, Quotes, and Jobs automatically from ...Zoho Desk to Simpro (Standalone) Overview and Setup Guide
Overview The Zoho Desk to Simpro integration allows you to send your tickets from Zoho Desk to a Quote or a Job in Simpro. The integration uses the email to search for a Customer or Contact and also allows you to choose a Site that is linked to them. ...