Zoho Desk to Simpro (Standalone) Overview and Setup Guide
Overview
How to Install
General Settings
Setting permissions
Once installed, you will be prompted to select the Department and Profiles to whom this extension will be visible. Choose the options you want, agree to the terms of use and click Install.

Authorise simPRO and Zoho
Once the extension is installed, go to the General Settings tab. Navigate to “Authorize your account for ZApps External Client service to activate this extension.” and authorise your simPRO account.
Next, navigate to “Authorize your account for Zoho OAuth service to activate this extension.” and authorise your Zoho account.
You should get a success message in the corner when this is done.
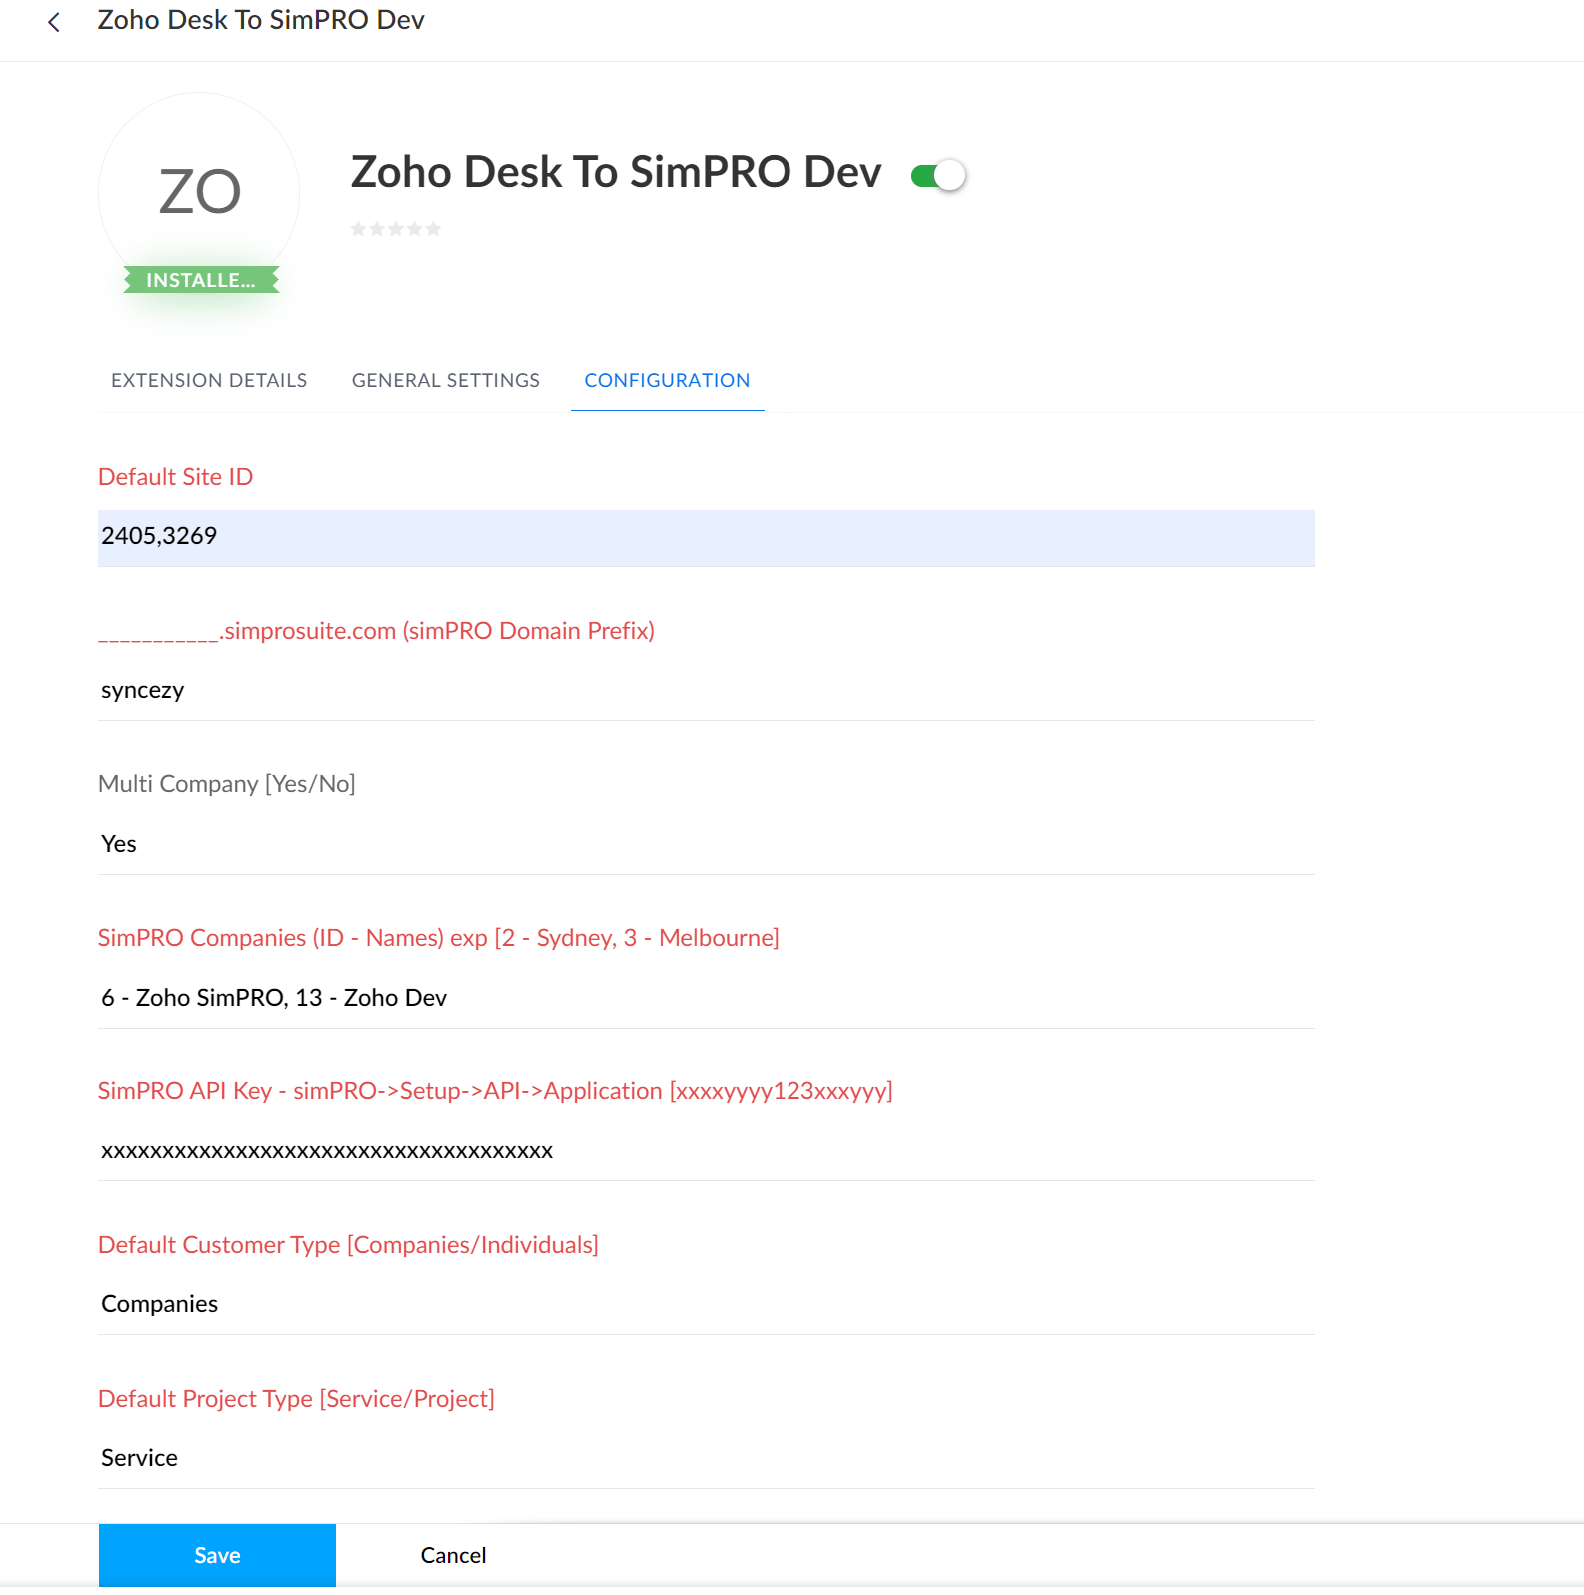
Configuration Details
Default Site ID
Here you need to set the Default Site ID to create a Quote or a Job. A Site and a Customer are mandatory fields for creating a Quote or Job. In the event the Customer does not have a Site, the Default Site configured will be linked to the Quote/Job instead
You will need to create a default site in simPRO, retrieve the Site ID and then add the ID in this field. You can also choose another Site if you wish, simply add that Site’s ID in this field.
___________.simprosuite.com (simPRO Domain Prefix)
This is used to connect your Zoho Desk account with your simPRO build URL.
For example, www.syncezy.simprosuite.com. In this example, we choose “syncezy” as the value to enter.
Multi Company [Yes/No]
This field is used to enable Multi Company syncing. Only “Yes” or “No” are acceptable values. Yes if you want to configure simPRO Multi Company, No if you don’t or if you have a single company.
SimPRO Companies (ID - Names) exp [2 - Sydney, 3 - Melbourne]
If you don’t have a multi-company setup, enter 0 - company name here. If you wish to link only one company, you will need to enter the company ID - company name (eg. 4 - SyncEzy).
If you have multi-company in simPRO, enter in this format: company ID - company name (eg. 6 - SyncEzy). For more companies, add the same with a comma separator (eg. 6 - SyncEzy, 7 - Zoho,..., etc).
simPRO Company IDs can be found by going to simPRO > Setup > Company
Note: Avoid using commas and dashes in the company name as these are specifically used as delimiters.
SimPRO API Key - simPRO->Setup->API->Application [xxxxyyyy123xxxyyy]
This helps us to communicate with simPRO. Navigate simPRO->Setup->API->Application > Create Application. Enter the following values:
Company: <Your company name>
Name: Zoho Desk Authentication
Redirect URI: https://desk.zoho.com / https://desk.zoho.com.au / https://desk.zoho.eu (depending on your Desk domain)
Email Address: <Your Email Address>
Description: Client application for Desk-simPRO
Authentication method: API Key
You have to copy the API Key and paste it into this field in the configuration. You can also write to support@syncezy.com if you need help with this.
Default Customer Type [Companies/Individuals]:
In this option, you have to set the value as Companies or Individuals. This defines the customer type to be created from the extension, Company Customer or Individual Customer.
Create Customer in simPRO if email not found [Yes/No]:
In this option, you have to set the value as Yes or No. This defines whether you want our extension to create a Customer in Simpro
Default Customer ID
If the above option (Create Customer in Simpro) is No, please add one or more (comma separated) customer IDs as fallback IDs. If you do not add an ID, you may encounter an error. You can set this to "0" if the above setting is "Yes".
Update simPRO Status from Desk [Yes/No]
If you set this option as "Yes", you'll see a "Update Status" button in the extension. This will allow to update the Desk ticket status to Simpro status. However, please note that the statuses must have the EXACT naming in both systems for this to work. You can also set this to "No" if you don't want to set it.
Click Save when all the changes are done.
Final Touches
Your configuration page should look something like this after it is done. It may vary depending on your inputs.
Related Articles
Zoho Desk to Simpro (CRM Integration Users) Overview and Setup Guide
Introduction The Zoho Desk to Simpro integration allows you to send your tickets from Zoho Desk to a Quote or a Job in Simpro. The integration uses the email to search for a Customer or Contact and also allows you to choose a Site that is linked to ...SimPRO - Zoho CRM Integration Overview and SyncEzy Portal User Guide
Integration Portal User Guide simPRO - Zoho CRM Integration - Overview Summary In summary, the integration offered by SyncEzy between simPRO and Zoho can achieve the following: 1. Sync Accounts, Contacts, Sites, Quotes, and Jobs automatically from ...Zendesk to SimPRO Installation and Overview Guide
Summary This is a user guide to walk you through some of the basic functionalities of the SimPRO by SyncEzy extension for Zendesk. The functionality of the app, the configuration details, settings and support information is listed below. Functions ...Simpro to Google Drive (Two-way) Integration: A Comprehensive Guide
In today’s fast-paced construction and service industry, seamless collaboration and efficient document management are critical. The Simpro to Google Drive integration bridges the gap between these two powerful platforms, allowing your team to work ...SyncEzy PropertyMe Integrations Self_ Setup Guide
Overview This guide provides step-by-step instructions for connecting your PropertyMe account to SyncEzy and configuring your destination application. Prerequisites Before you begin, ensure you have: An active SyncEzy account. Valid PropertyMe login ...