Creating a Service account in SharePoint with the right permissions.
Step-by-step Guide: Creating a Service Account And Selecting the right permissions in SharePoint
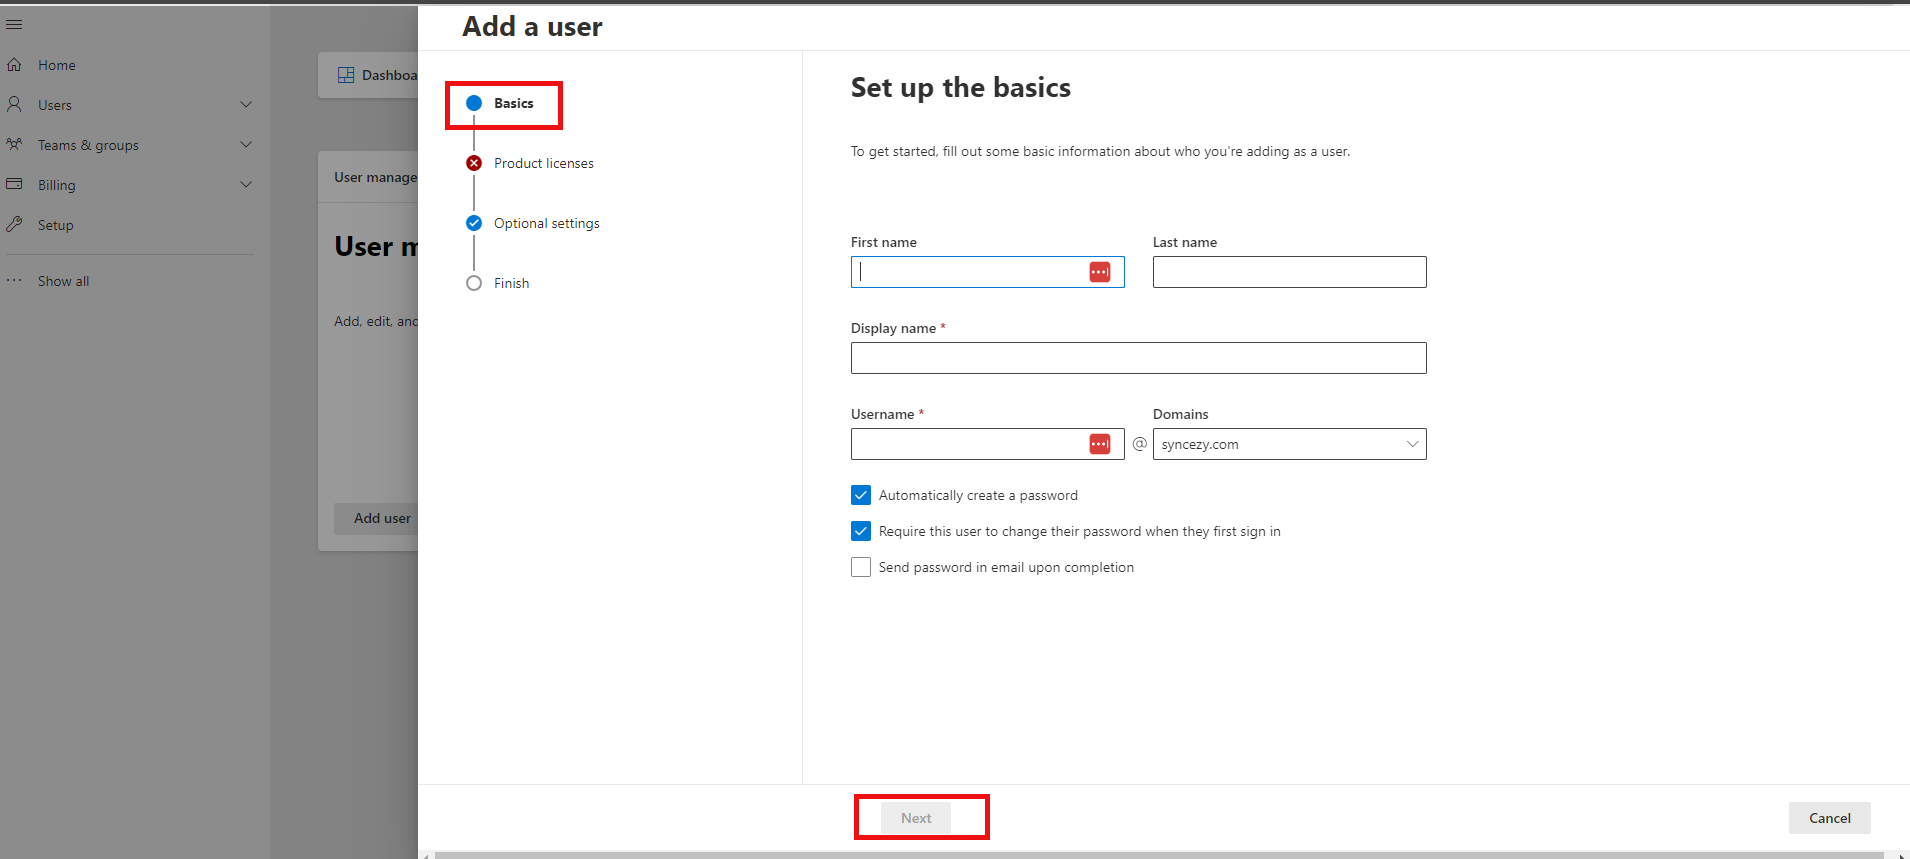
1. Login to your SharePoint administrator account and then click on Add User on the Home page.

2. Fill the basic required details and then click on Next.
3. Select the country and choose appropriate license for the user to access the SharePoint app and then click Next. (Minimum requirement is SharePoint license)
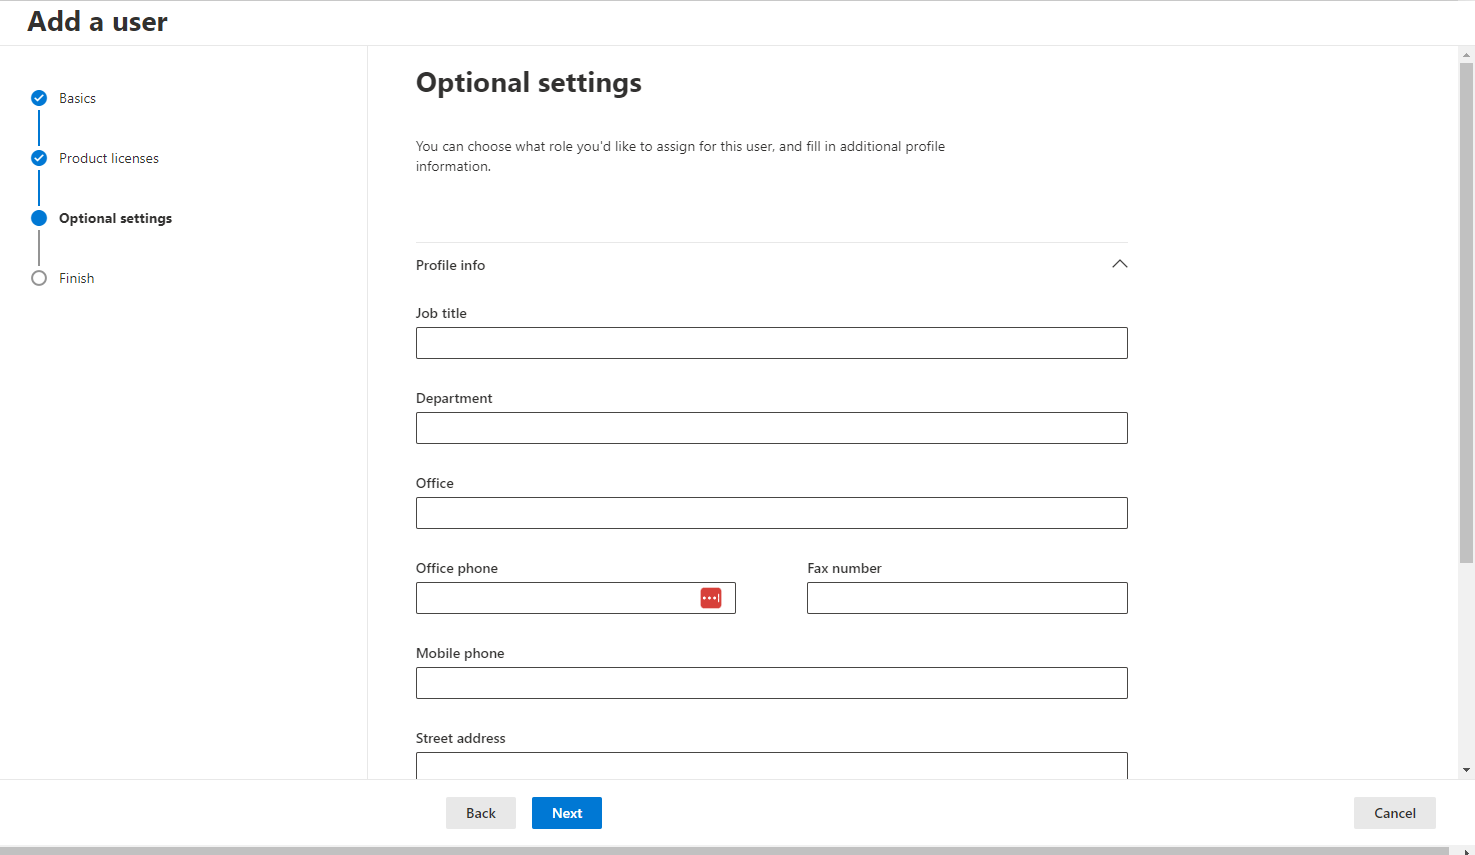
4. You can choose what role you'd like to assign for this user, and fill in additional profile information.
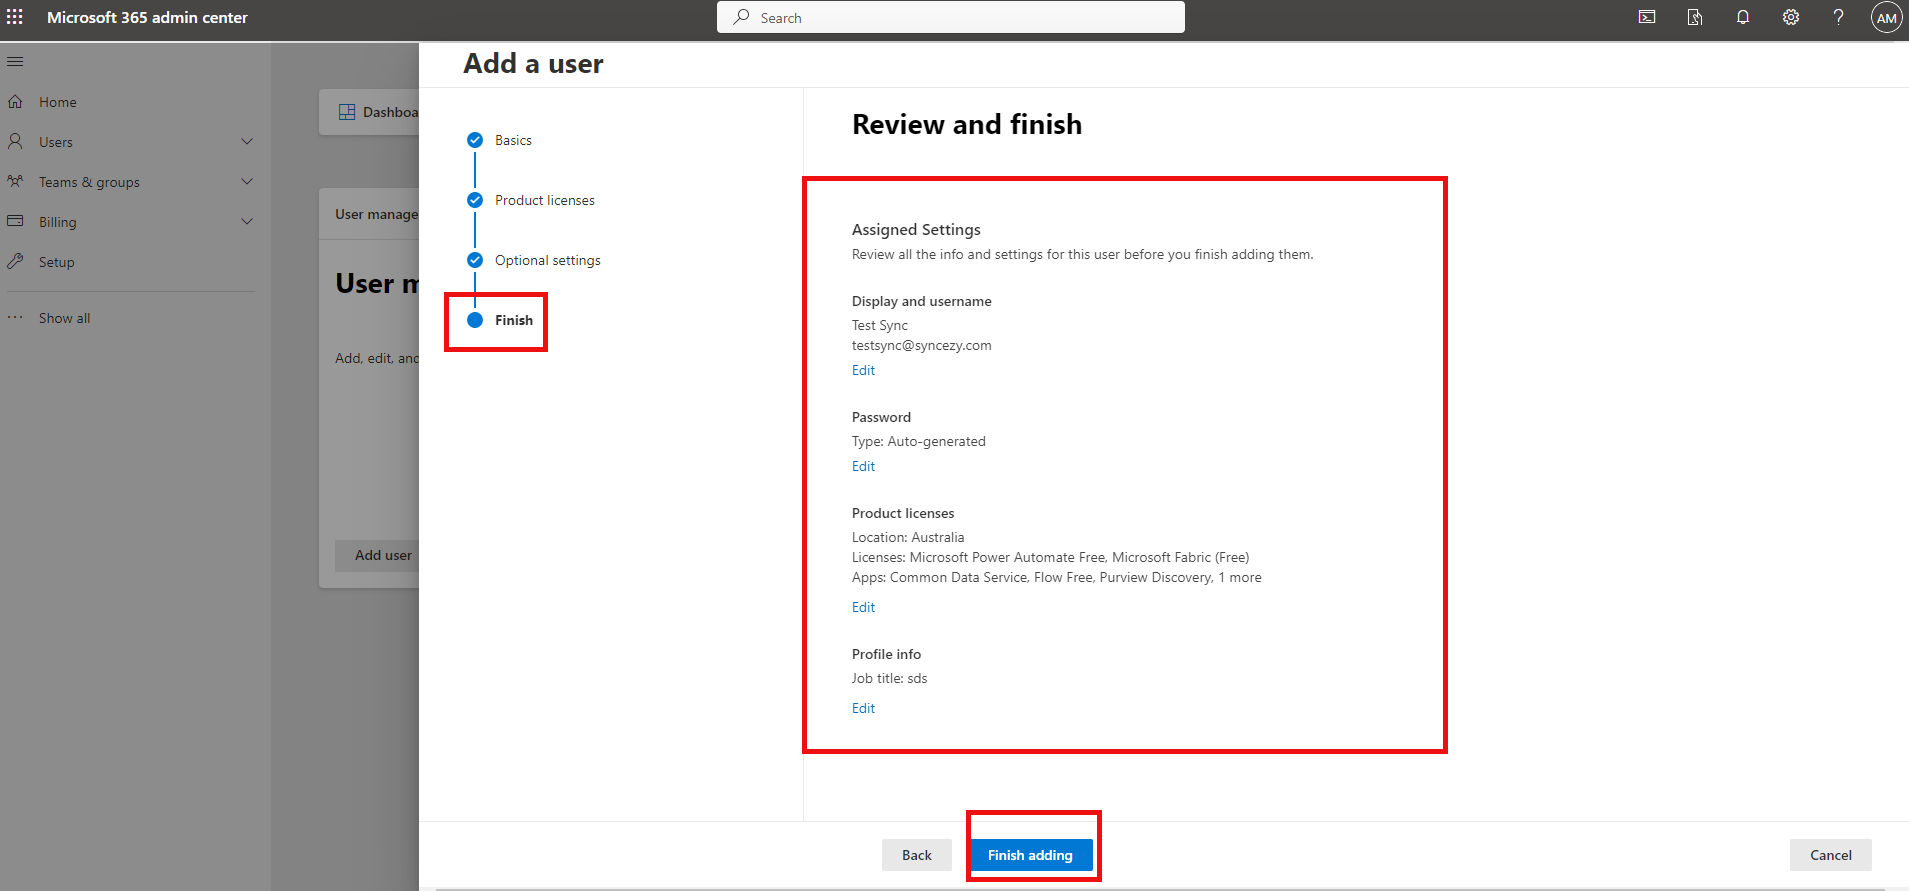
5. Review the submitted details and finish the user setup.
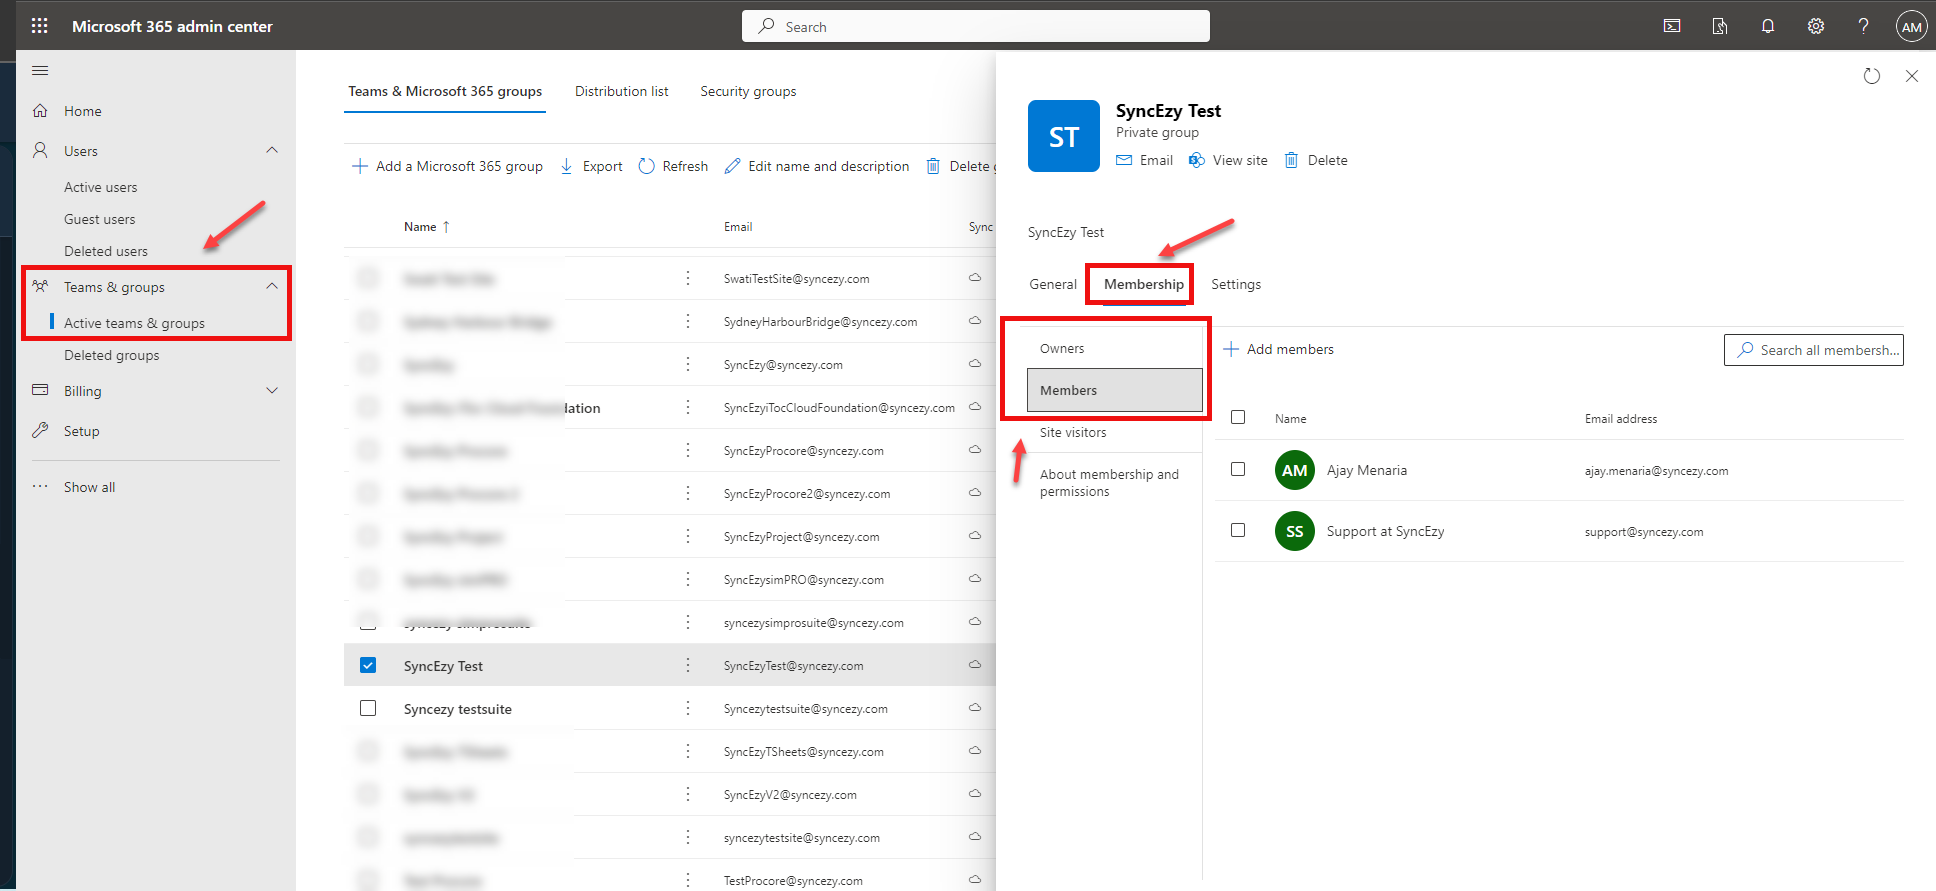
6. After adding the user, proceed to Teams & Groups. From there, choose the specific site(s) or group(s), and then assign the newly created service user credential as an owner or Member (Edit permissions) to be able to see those sites as an option to select in your SyncEzy account on the configuration page (the next step required to configure your integrations for each project).
Reauthenticating SharePoint with a Service Account for an existing already connected integration.
Other questions
Have a support question?
Reauthenticating SharePoint with a Service Account for an existing already connected integration.
It is crucial that this new user or service user has the same permissions as the current account otherwise sync will break.
Once your service user is created, follow the steps in this article to reauthenticate without interrupting your existing synchronization.
Why a Proper SharePoint Account is Required for SyncEzy Integrations
To successfully integrate SyncEzy with SharePoint, it is essential to use a proper SharePoint user account rather than a generic service account or shared email address. This is because our integration relies on OAuth authentication, which requires a login from a user account.
Why Can’t We Use a Shared Email or a Generic Service Account?
A shared email account or generic service account may lack the required authentication credentials and permissions to perform OAuth-based authentication. SharePoint and OneDrive require a proper Microsoft 365 user account with the correct permissions to log in and authenticate the integration.
What Type of SharePoint Account is Needed?
- A Microsoft 365 user account with at least a basic license.
- The account must have access to the necessary SharePoint sites and document libraries used in the integration.
- It should be able to authenticate using OAuth login for security and integration purposes.
- Important Consideration: Approving the SyncEzy App
In some Microsoft 365 environments, an admin approval may be required to allow third-party apps (like SyncEzy) to integrate with SharePoint. Ensure that app approvals in Azure Active Directory (AAD) and Microsoft 365 Admin Center are reviewed if access issues occur.
Other questions
Have a support question?
We offer three support channels:
Chat - Live Chat (24x5 support) from within your integration portal.
Phone - #1 for Support
AUS: +61 2 9136 9448
NZ: +64 9 303 2999
UK: +44 203 670 1109
US: +1 720 500 9302
Email - support@syncezy.com
Related Articles
Creating a Service account in SharePoint with the right permissions.
Step-by-step Guide: Creating a Service Account And Selecting the right permissions in SharePoint 1. Login to your SharePoint administrator account and then click on Add User on the Home page. 2. Fill the basic required details and then click on Next. ...Benefits & Steps to Create Service User Credentials for your SyncEzy Integration between Procore and SharePoint
See our articles linked for step-by-step instructions on how to set up a service user credential with the right permissions in Procore and SharePoint respectively to quickly get this step done and syncing! Please do not hesitate to contact support if ...Benefits & Steps to Create Service User Credentials for your SyncEzy Integration between Autodesk Forma (formerly Autodesk Constrcution Cloud) and SharePoint
See our articles linked for step-by-step instructions on how to set up a service user credential with the right permissions in Autodesk Forma (Formerly Autodesk Constrcution Cloud) and SharePoint respectively to quickly get this step done and ...Procore to SharePoint Two-way Integration: Set-up your SyncEzy Account & FAQs
This document addresses the variety of questions we encounter while helping clients. If you have a question that’s not addressed her please write to us at support@syncezy.com About the Procore to SharePoint integration Please also visit our ...Project Sync: Essential Project Permissions in Procore to Get Started
Project Sync: Essential Project Permissions Required in Procore to Set-up your SyncEzy Account & Integrations To sync projects, the user credentials used to connect your Procore account in your SyncEzy integration need to have access to all the tools ...