How can I add or remove tools to an already syncing project?
How can I add or remove more tools to an already syncing project?
With the Procore to SharePoint Integration, you now have the power to add tools to existing syncing projects effortlessly. Here's what you need to know:
Adding Tools:
You can easily add extra tools to your project. This ensures your project structure remains intact while allowing for expansion.
Project Path Location: You won't be able to change the project path location. This keeps things consistent and prevents potential complications.
Edit Project Button: If you've already added all the tools to your project, the "Edit Project" button won't work. Similarly, if you're using company documents sync or folder sync options, you won't be able to edit your project.
In a nutshell, while the Procore to SharePoint integration streamlines project management, it's important to understand its features and limitations to make the most out of it.
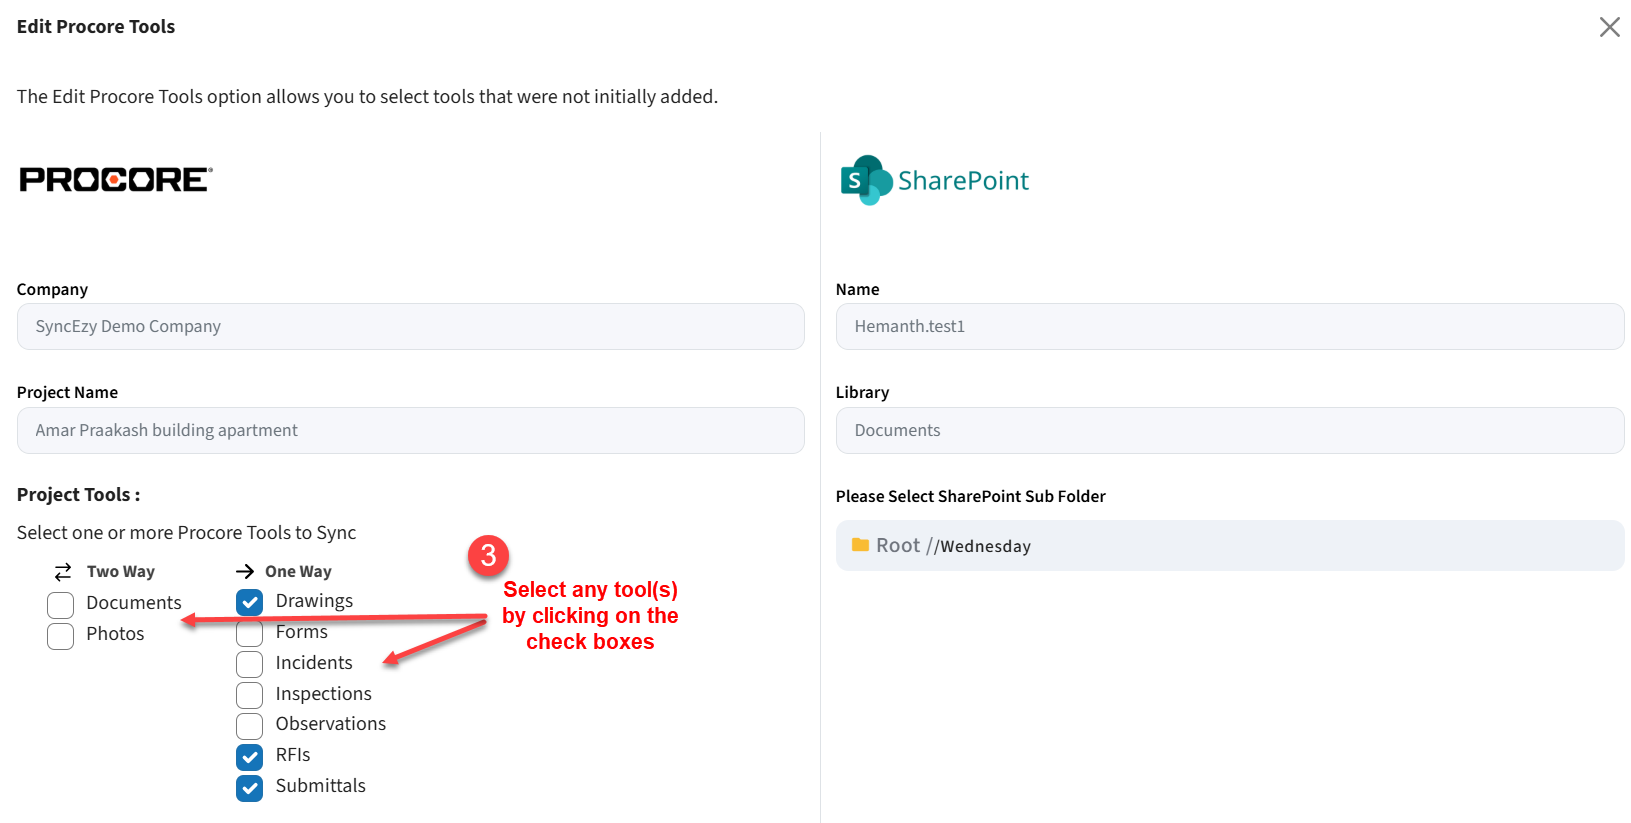
Please refer to the steps below in order to add tools to an existing syncing project:
1. Login and Access Integration Settings: Log into your SyncEzy account and open the integration. Navigate to the configuration tab.
2. Edit Project: Locate the project you want to edit and click on the Edit icon given on the right side of the project configuration. Keep in mind that you can't edit the project if all tools are already selected, or if you're using company documents or folder sync feature.
3. Select Tools: Choose the tools you want to add to the project.
4. Click on "Select this location" and then "Add Project" on the next screen.

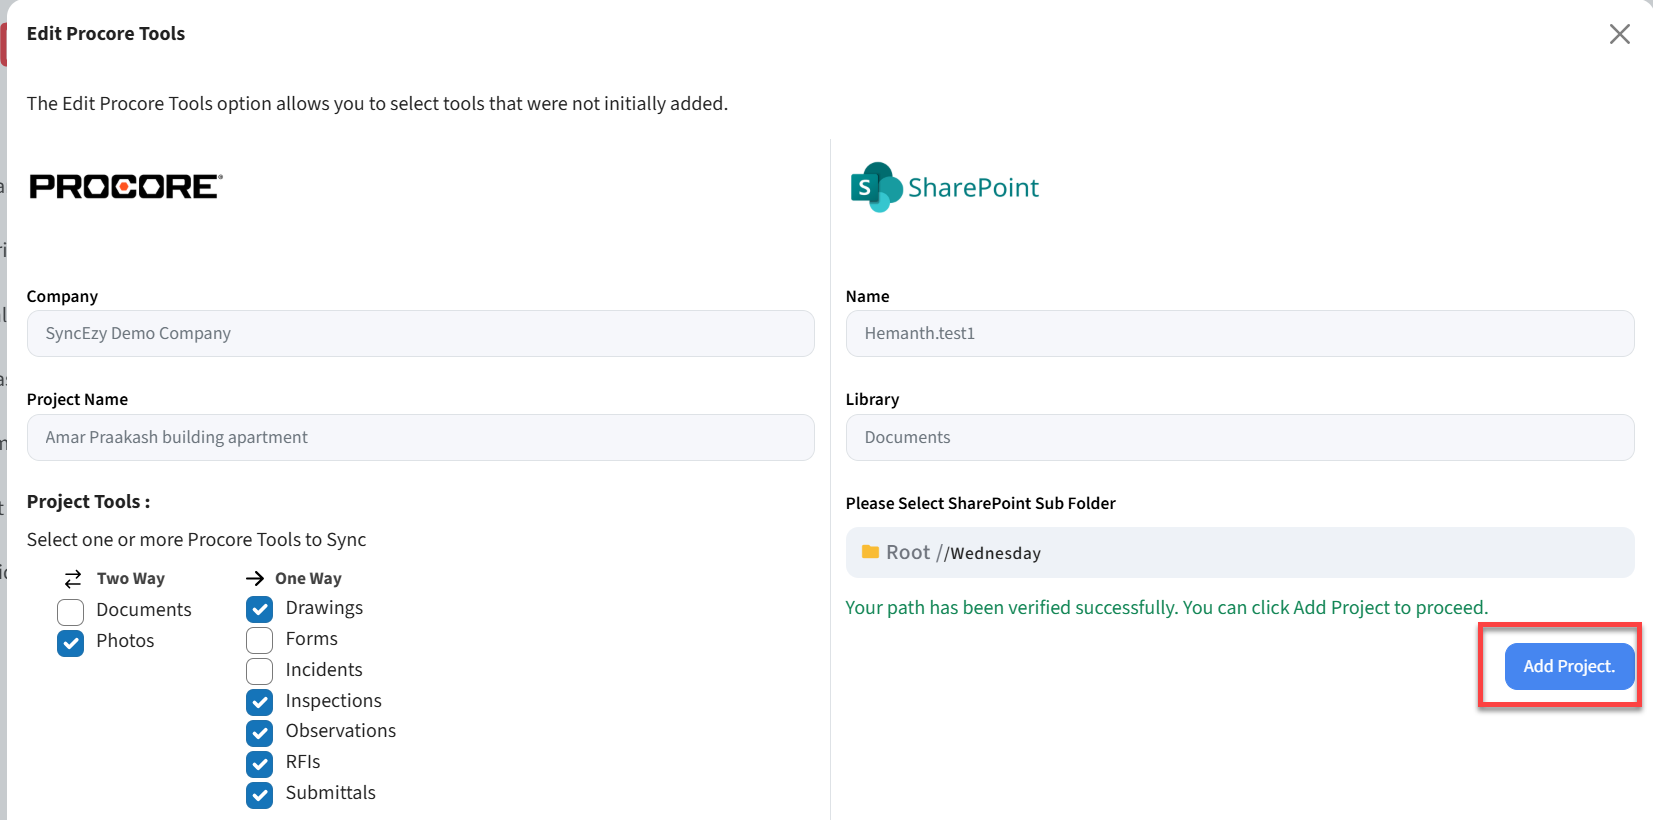
5. Confirmation: After updating, the screen will refresh, and you'll see the newly added tools in your project. They will soon be synchronized with your project's folder path, alongside the other tool folders.
4. Click on "Select this location" and then "Add Project" on the next screen.
5. Confirmation: After updating, the screen will refresh, and you'll see the newly added tools in your project. They will soon be synchronized with your project's folder path, alongside the other tool folders.
Removing tools
You can easily remove extra tools from your existing syncing project. Before proceeding, please ensure that the project’s initial sync has been completed. For more information about the initial sync, please refer to this article.
Please refer to the steps below in order to remove tools to an existing syncing project:
Step 1 & 2:
Follow the same Steps 1 and 2 outlined above.
Follow the same Steps 1 and 2 outlined above.
Step 3: De-Select Tools: Click the checkmarks next to the tools you want to remove. This will uncheck the previously selected tools.
In the example image, the Drawings tool is being removed from the sync.
Step 4: Confirm Removal
A confirmation pop-up will appear. Type “DELETE TOOL” into the text box to proceed
Step 5: Remove the Tool
Click “Yes” to confirm. A success message will appear in the top-right corner.
Please note that it may take a few minutes for the tool to be fully removed.
Please note: This will not delete any data from Procore or SharePoint side. It will only break the sync for specific tool and remove its information from our database.
Step 6. Confirmation: After a few minutes, refresh the page. You will see that the tool has been successfully removed from the project.
Other questions
Have a support question?
We offer three support channels:
Chat - Live Chat (24x5 support) from within your integration portal.
Phone - #1 for Support
AUS: +61 2 9136 9448
NZ: +64 9 303 2999
UK: +44 203 670 1109
US: +1 720 500 9302
Email - support@syncezy.com
Related Articles
How to add a project to sync?
Prerequisite: Before you start adding project on SyncEzy portal , Please make sure you have installed SyncEzy app from the Autodesk Marketplace in your Autodesk Forma (formerly Autodesk Construction Cloud) account. please review the following article ...How to add a project to sync?
How can I add a Project to sync to SharePoint? The Configuration tab is where you will add your projects from Procore and select the location in SharePoint you want to sync it to. We have four methods to configure the projects. 1. Full Project Sync ...How to add a project to sync?
How to add a project to sync? The Configuration tab is where you will add your projects from Procore and select the location in Google Drive you want to sync it to. 1. Click on the "Add Project to Sync" button 2. Choose your Procore company first. 3. ...How to add a project to sync?
How to add a project to sync? The Configuration tab is where you will add your projects and Company Documents from Procore and select the location in box you want to sync it to. Refer to the steps outlined below for adding a project, followed by ...Custom File Name Structure for One-Way Sync Tools
The Procore–SharePoint integration now supports a custom file name structure for one-way sync tools. This feature allows you to define how files are named when they are synced, making it easier to identify, organize, and manage documents within ...